Choosing the right subcutaneous injection sites and rotating them systematically is one of the most practical skills for anyone administering peptides, GLP-1 receptor agonists, or other subq compounds at home. Done well, rotation keeps tissue healthy, maintains consistent absorption, and prevents the lumps and hollows that can develop from repeated needle trauma in one spot.
What "Subcutaneous" Actually Means
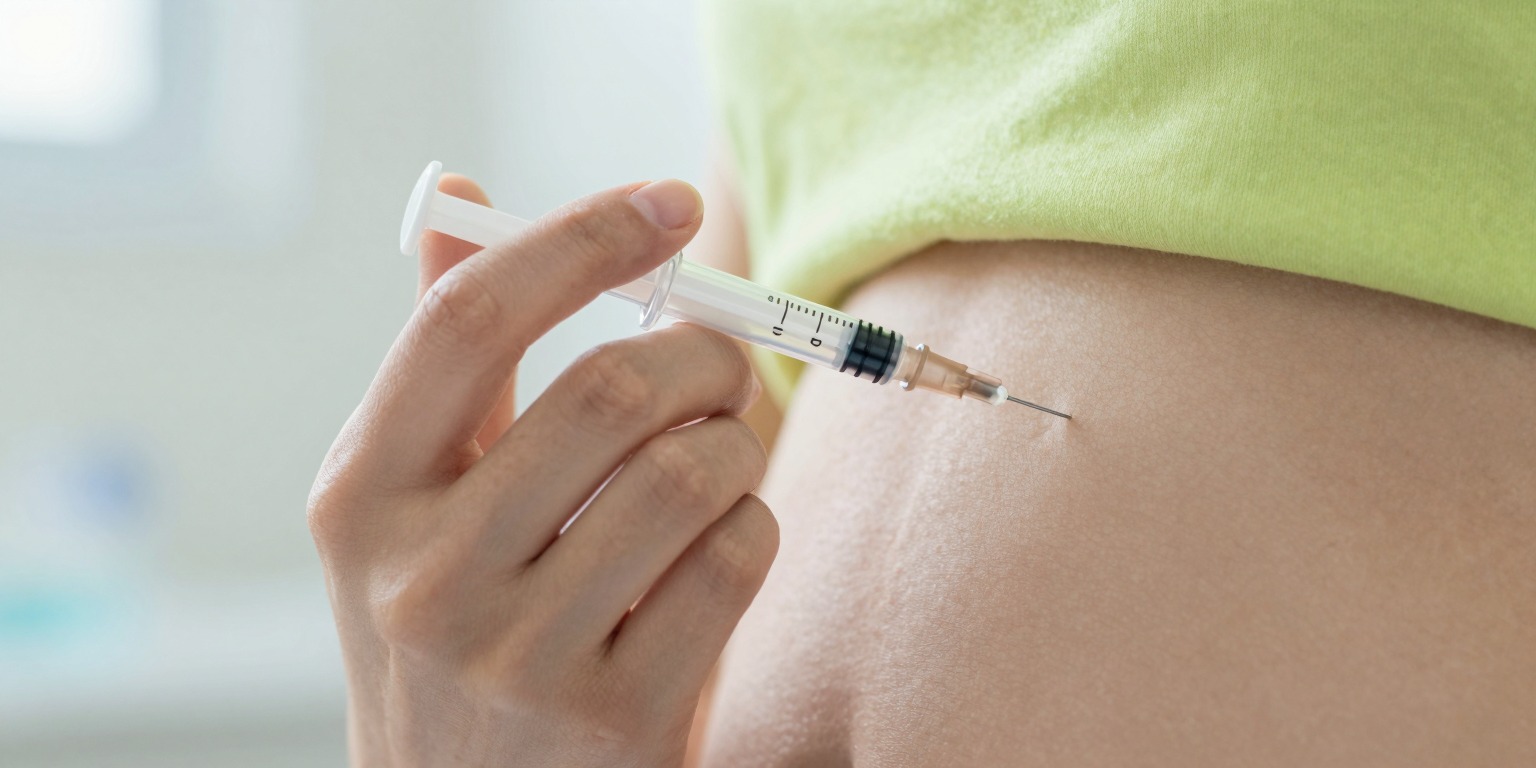
A subcutaneous injection delivers a compound into the hypodermis: the fatty layer that sits just beneath the skin but above muscle. Unlike intramuscular (IM) injections that target deeper tissue, subq injections use a short needle (typically 4-8 mm, 29-31 gauge) inserted at a 45-90 degree angle, depending on the thickness of the fat layer and the needle length being used.
The hypodermis acts as a slow, steady reservoir. Compounds deposited there are absorbed gradually through small capillaries, which is why subq delivery suits many peptides and weekly GLP-1 medications that benefit from extended, even release.
The Common Subcutaneous Injection Sites
Abdomen
The abdomen is the most frequently chosen subq site for a straightforward reason: there is nearly always enough subcutaneous fat present, even in lean individuals, and the area is easy to see and reach with one hand.
How to use it:
- Stay at least 2 inches (5 cm) away from the navel in all directions. The tissue around the navel is denser and less vascular.
- Use the band of soft tissue that runs roughly from the hip bone on one side to the hip bone on the other, staying below the ribs.
- Pinch up a small fold of skin if needed; inject at 45-90 degrees.
Outer Thigh
The lateral (outer) thigh (roughly the middle third of the thigh from the front) is a reliable secondary site, particularly for people who prefer to sit while injecting.
How to use it:
- Target the outer surface, not the inner thigh or the very front (which sits over the quadriceps muscle and increases the risk of accidental IM injections).
- Pinching is useful here, especially in leaner individuals.
- Avoid the knee and groin areas.
Back of the Upper Arm (Tricep Region)
The back of the upper arm is commonly listed as a subq site, though it requires either a partner or some flexibility to self-inject accurately.
How to use it:
- Target the soft area midway between the shoulder and elbow on the posterior surface.
- Pinch the tissue firmly before injecting.
- This site is used more often with shorter, fine-gauge needles where accidental IM delivery is less likely.
Upper Outer Buttock
The upper outer quadrant of the glute has a substantial subcutaneous fat layer and is used by some as a rotation zone. Self-administration is awkward, so this site is more practical with a partner or when using a longer-reach approach.
Less Common Sites
Some protocols mention the lower back flank (love handle area) as an additional zone. Clinical research on insulin delivery (which has generated most of the long-term subq site data) has historically focused on the four zones above.
Why Rotation Matters
When the same spot is punctured repeatedly, the immune response leads to micro-scarring and localized fat changes. This produces lipodystrophy, which has two main presentations:
| Type | Appearance | Effect on Absorption |
|---|---|---|
| Lipohypertrophy | Firm, rubbery lump under the skin | Slows or unpredictably alters absorption |
| Lipoatrophy | Sunken hollow or depression | Can impair delivery; cosmetically noticeable |
Lipohypertrophy is the more common of the two and is well-documented in people who self-inject insulin daily. The same mechanism applies to peptides. Injecting into a hypertrophic area can reduce the bioavailability of whatever compound is being administered, meaning the dose delivered to circulation may be meaningfully lower than intended. That makes consistency harder to achieve.
Beyond the tissue changes, rotating sites simply reduces localized soreness. Tissue that has not been recently injected absorbs each dose with less discomfort.
A Simple Rotation System
The clearest approach is to divide your available sites into zones, assign each zone a number, and work through them in order before returning to zone 1. Here is a practical eight-zone model:
- Right abdomen, upper half
- Right abdomen, lower half
- Left abdomen, upper half
- Left abdomen, lower half
- Right outer thigh
- Left outer thigh
- Right upper arm
- Left upper arm
 Keeping a simple written log of which zone you used last makes the rotation system automatic rather than something you have to actively remember.
How to use it:
- Move to the next zone with each injection. On a once-daily protocol, you complete the full cycle in 8 days before returning to zone 1.
- Within a zone, shift your needle placement by at least 1 inch (2.5 cm) from the previous mark. Mentally divide each zone into a small grid and work across it before repeating any square.
- Some people use a physical notepad, a whiteboard dot-map, or an app log to keep track.
For twice-daily protocols (morning and evening), moving two zones per day still gives each zone about four days of rest in an eight-zone system.
Adapting for Fewer Sites
If upper arm injections are impractical for you, compress to a six-zone system using just the abdomen (four zones) and both thighs. The rule is the same: each zone gets at least a few days off before it is used again.
Technique Checklist
Good site selection is only part of the picture. A few technique fundamentals reduce complications across all sites:
- Clean the skin with an alcohol swab and allow it to dry completely before injecting. Wet alcohol can sting and may carry surface bacteria into the puncture.
- Use the right needle length. A 4-6 mm needle is typically sufficient for most adults at a 90-degree angle. A longer needle (8 mm) inserted at 45 degrees is also appropriate and may be preferable in leaner individuals.
- Inject slowly. A steady, gentle push over several seconds disperses the solution more evenly and reduces stinging.
- Do not rub after injecting. Rubbing can accelerate local absorption unevenly and increases bruising risk. Apply light pressure with a clean cotton swab if needed.
- Inspect sites regularly. Run a finger over previously used areas. If you feel a firm nodule, avoid that spot until it resolves. A few weeks of rest is typically sufficient for early-stage lipohypertrophy.
- Rotate needles. Reusing needles dulls the tip, increasing tissue damage and discomfort even at fresh sites.
Track This with Redose
Keeping a rotation log by memory is easy to forget over a multi-week protocol. The Redose app lets you log each dose with the injection site recorded, so you can glance at your history and confirm you are rotating properly rather than guessing. The app also tracks your vial inventory and sends dose reminders, which is useful if you are running more than one compound on different schedules.
A Note on Investigational Compounds
Most peptides discussed in the context of self-administration (BPC-157, TB-500, CJC-1295, and others) are not approved by the FDA for human use outside of clinical research settings. Semaglutide and tirzepatide are FDA-approved when prescribed, but many compounds circulating in research circles have limited human safety data. Rotation technique matters regardless of the compound, but it does not change the fact that these substances should be used only under qualified medical supervision where appropriate.
Conclusion
Systematic subcutaneous injection site rotation is a straightforward habit with meaningful benefits: it preserves tissue health, maintains predictable absorption, and reduces day-to-day discomfort. Map out your available zones, work through them in order, and keep a log so the system runs automatically rather than requiring active recall. Pairing good rotation practice with correct technique (clean skin, appropriate needle length, slow injection) covers the fundamentals that matter most for anyone administering subq compounds regularly.
This article is educational information, not medical advice. Talk to a qualified healthcare provider before starting any protocol.