Knowing how to inject peptides correctly is the foundational skill that separates a safe, consistent practice from one that leads to site reactions, contamination, or wasted product. Subcutaneous (SubQ) injection, which delivers the compound into the thin fat layer just beneath the skin, is the standard route for the vast majority of peptides used in research and clinical contexts. This guide walks through every step: gathering the right supplies, preparing the injection, executing the technique, rotating sites, and disposing of sharps properly.
Important note: Most peptides discussed in fitness, longevity, and recovery circles are investigational compounds. They are not FDA-approved for general use. Everything in this guide is educational. Consult a qualified healthcare provider before using any peptide.
Why Subcutaneous Injection?
SubQ injections deposit a compound into the fatty tissue just below the skin surface, where a network of small blood vessels provides gradual, relatively steady absorption. Compared with intravenous or intramuscular injection, SubQ technique requires no special anatomy knowledge, causes less discomfort, and carries a lower risk of hitting nerves or blood vessels. For peptides (which are fragile chains of amino acids) SubQ delivery also avoids the mechanical shear stress of forcing a solution through dense muscle.
Supplies Checklist
Before you begin, assemble everything you need in one place. Working on a clean, flat surface reduces the chance of contamination.
| Item | Notes |
|---|---|
| Insulin syringes | 28-31 gauge, 5/16 in (8 mm) needle; 0.5 mL or 1 mL barrel |
| Reconstituted peptide vial | Stored in the refrigerator; brought to room temperature |
| Alcohol swabs (70% isopropyl) | One per injection site; one for the vial septum |
| Sterile gauze or cotton balls | For light pressure post-injection |
| Sharps container | Rigid, puncture-resistant; available at most pharmacies |
| Clean surface | A paper towel or sterile drape works fine |
A note on syringes: the unit markings on an insulin syringe are calibrated for U-100 insulin, not peptides. You will need to calculate the volume (in mL or cc) that corresponds to your dose in micrograms or milligrams. The reconstitution calculator at /calculators can do this math for you automatically once you enter your vial concentration.
Step-by-Step Injection Technique
1. Wash Your Hands
Scrub hands thoroughly with soap and water for at least 20 seconds and dry them with a clean towel. This single step eliminates the majority of contamination risk.
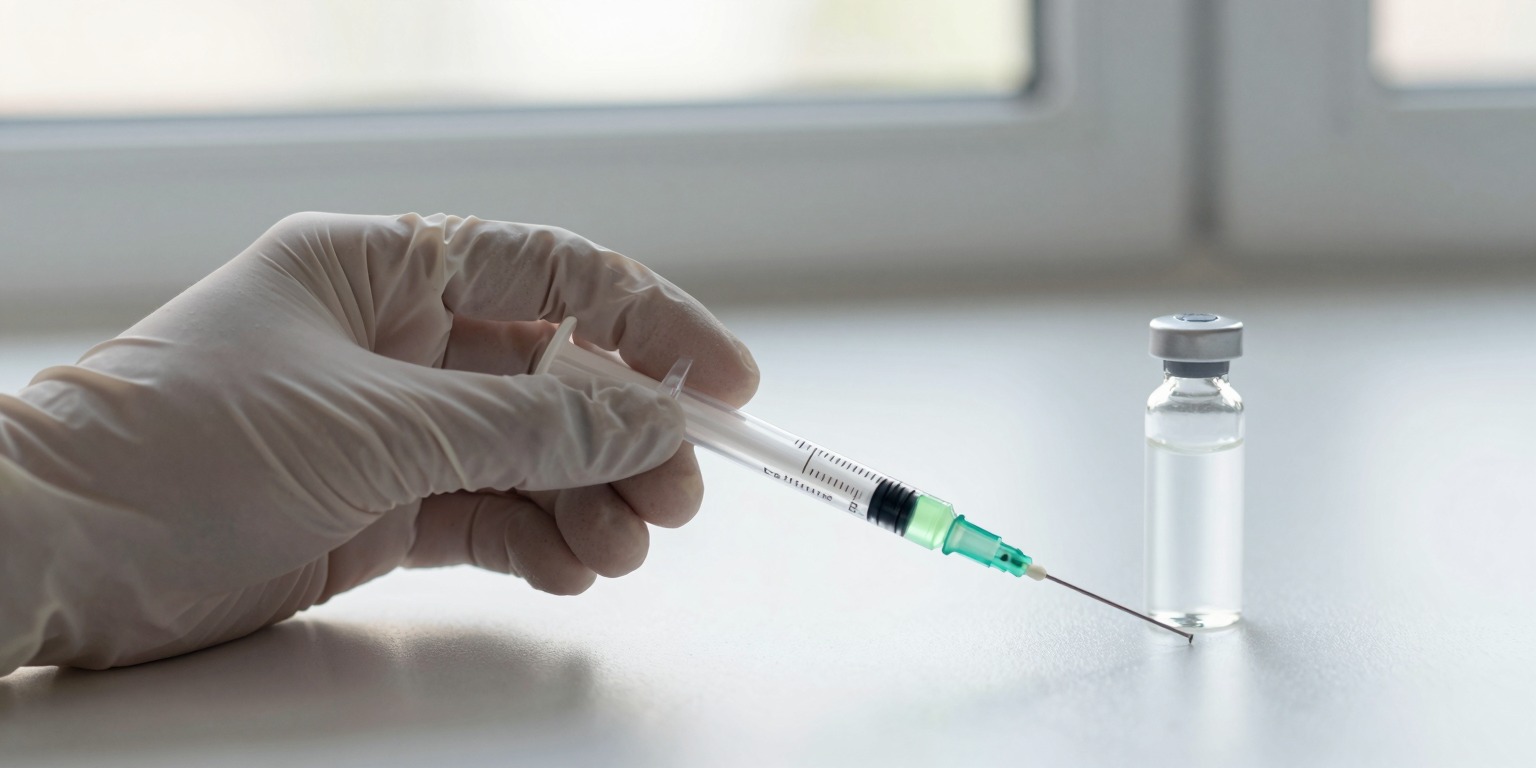
2. Prepare the Vial
Remove the vial from the refrigerator and allow it to reach room temperature for 5-10 minutes. Cold solution is one of the most common causes of a stinging sensation during injection.
Wipe the rubber septum of the vial with a fresh alcohol swab and allow it to air-dry for 10-15 seconds. Never blow on it to speed drying.
3. Draw the Dose
- Uncap the syringe and pull the plunger back to draw air equal to your desired dose volume.
- Insert the needle into the septum and inject that air into the vial (this creates positive pressure and makes drawing easier).
- Invert the vial and slowly pull the plunger back until you have slightly more than your target volume.
- Tap the barrel gently to move any air bubbles to the tip, then push the plunger forward carefully until the bubbles are expelled and you reach the exact dose.
- Remove the needle from the vial.
4. Choose and Prepare the Injection Site
The three most practical SubQ sites for self-injection are:
- Abdomen: the preferred default; pinch a fold of skin at least 2 inches (5 cm) from the navel
- Outer thigh: the lateral (outer) surface of the upper thigh; easy to reach and has consistent fat coverage
- Back of the upper arm: useful but harder to self-inject; better suited if someone assists
Wipe the chosen site with an alcohol swab and allow it to air-dry completely before proceeding. Injecting through wet alcohol is a common source of unnecessary sting.
For a structured rotation plan that prevents overworking any single area, see the injection site rotation guide.
5. Inject
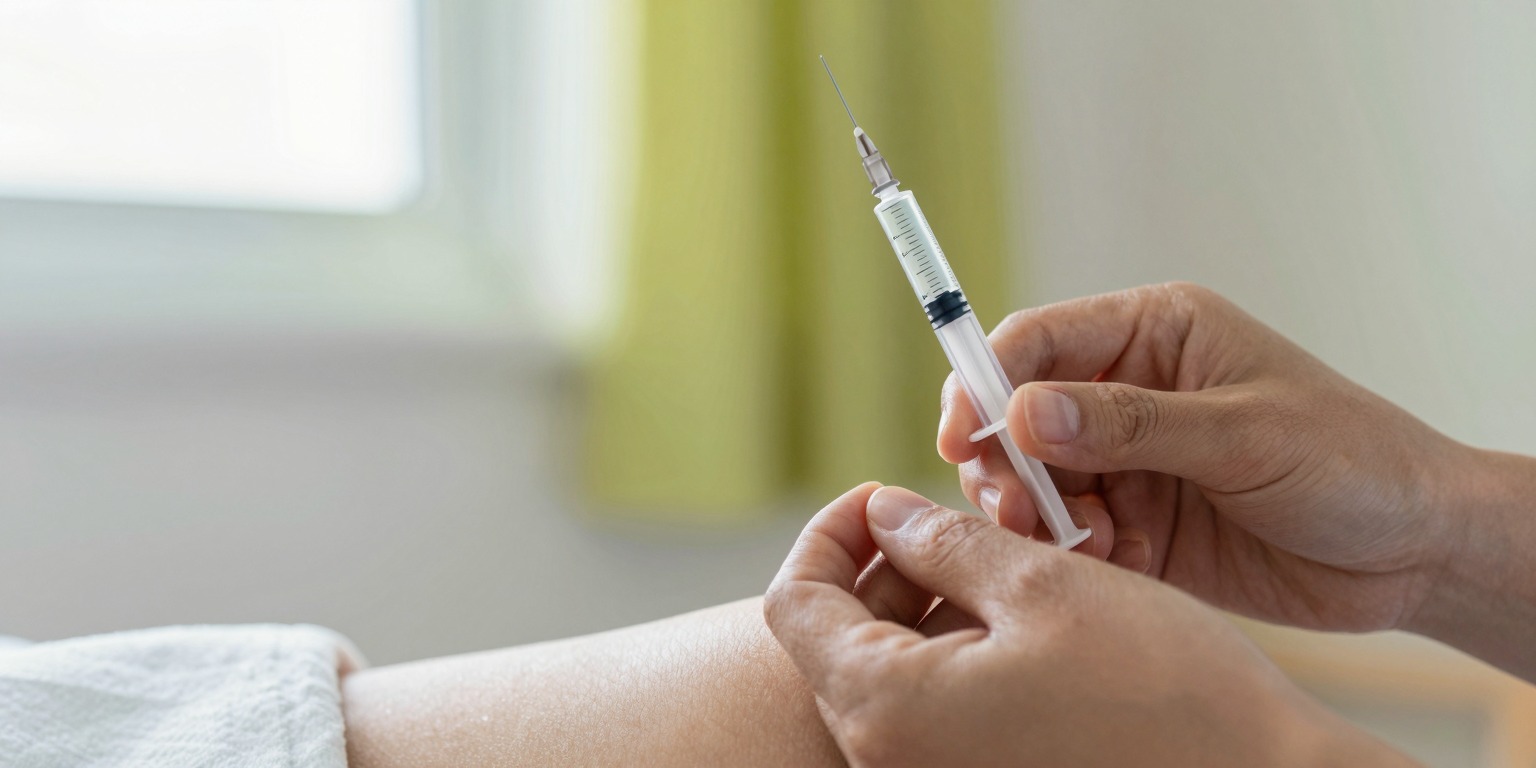 Pinch a small fold of skin and insert the needle at a 45-degree angle to reach the subcutaneous fat layer without going into muscle.
- Pinch a small fold of skin between your thumb and forefinger (this lifts the subcutaneous layer away from muscle).
- Insert the needle at a 45-degree angle (or 90 degrees if you have adequate fat coverage and are using a very short 5/16 in needle).
- Release the skin fold once the needle is in.
- Push the plunger down slowly and steadily. Injecting too fast is another common cause of discomfort.
- When the plunger bottoms out, hold for two seconds, then withdraw the needle at the same angle it entered.
6. Post-Injection
Apply light pressure with a gauze pad or cotton ball. Do not rub, as rubbing can cause the solution to disperse unevenly or irritate the tissue. A small bubble or raised area ("wheal") immediately after injection is normal and typically resolves in minutes.
Rotating Injection Sites
Repeatedly injecting the same spot causes lipodystrophy, a localized breakdown or thickening of fat tissue that can impair absorption and leave visible irregularities under the skin. Rotation is not optional; it is part of safe technique.
A simple rotation framework:
- Divide each available zone (left abdomen, right abdomen, left thigh, right thigh) into a mental grid.
- Move to a new point within the grid with each injection.
- Return to any given point only after it has had adequate time to recover, typically several days to a week.
Redose's injection-site tracker handles this automatically so you never have to remember manually.
Sharps Disposal
Used syringes and needles are regulated medical waste and must never go into household recycling or trash without being contained. The correct steps:
- Immediately after withdrawing the needle, place the entire syringe (uncapped) into a rigid sharps container. Do not recap needles by hand, because needle-stick injuries most often happen during recapping.
- Fill the container to no more than three-quarters full, then seal it.
- Check your local regulations. Options typically include:
- Mail-back programs: containers purchased at pharmacies can often be mailed to a licensed disposal facility
- Drop-off sites: many pharmacies, hospitals, and community health programs accept sealed containers
- Household hazardous waste programs: operated by many municipalities
Never place loose, uncapped needles in any container that a collection worker could handle.
Common Mistakes to Avoid
- Skipping the air-dry step after swabbing with alcohol: the alcohol itself can sting and may irritate tissue if injected
- Reusing syringes or needles: needle tips deform after a single use, and reuse increases pain and infection risk
- Injecting cold solution: always let the vial reach room temperature first
- Injecting into the same site repeatedly: follow a consistent rotation protocol
- Rushing the plunger: slow, steady pressure minimizes discomfort and distributes the solution more evenly
Calculating Your Dose Volume
The math behind peptide dosing (converting micrograms to the correct insulin syringe units based on your vial concentration) trips up many beginners. The free calculator at /calculators handles reconstitution math and dose conversion in seconds. If you are unfamiliar with how to prepare a peptide vial before drawing, the reconstitution guide covers that process in detail.
Track This with Redose
Once you have your injection technique down, staying consistent is the next challenge. The Redose app lets you log each dose in a single tap, pre-filling the time, site, and amount, and tracks your site rotation automatically so you never overwork one area. It also keeps a running inventory of what's left in each vial.
Conclusion
Subcutaneous injection is a straightforward skill that becomes second nature quickly with deliberate practice. The fundamentals (sterile preparation, correct needle angle, consistent site rotation, and responsible sharps disposal) are the same whether you are administering a GLP-1 analog under medical supervision or participating in a peptide research protocol. Get these basics right every time, and the mechanical side of your protocol will rarely be a source of problems.
This article is educational information, not medical advice. Talk to a qualified healthcare provider before starting any protocol.